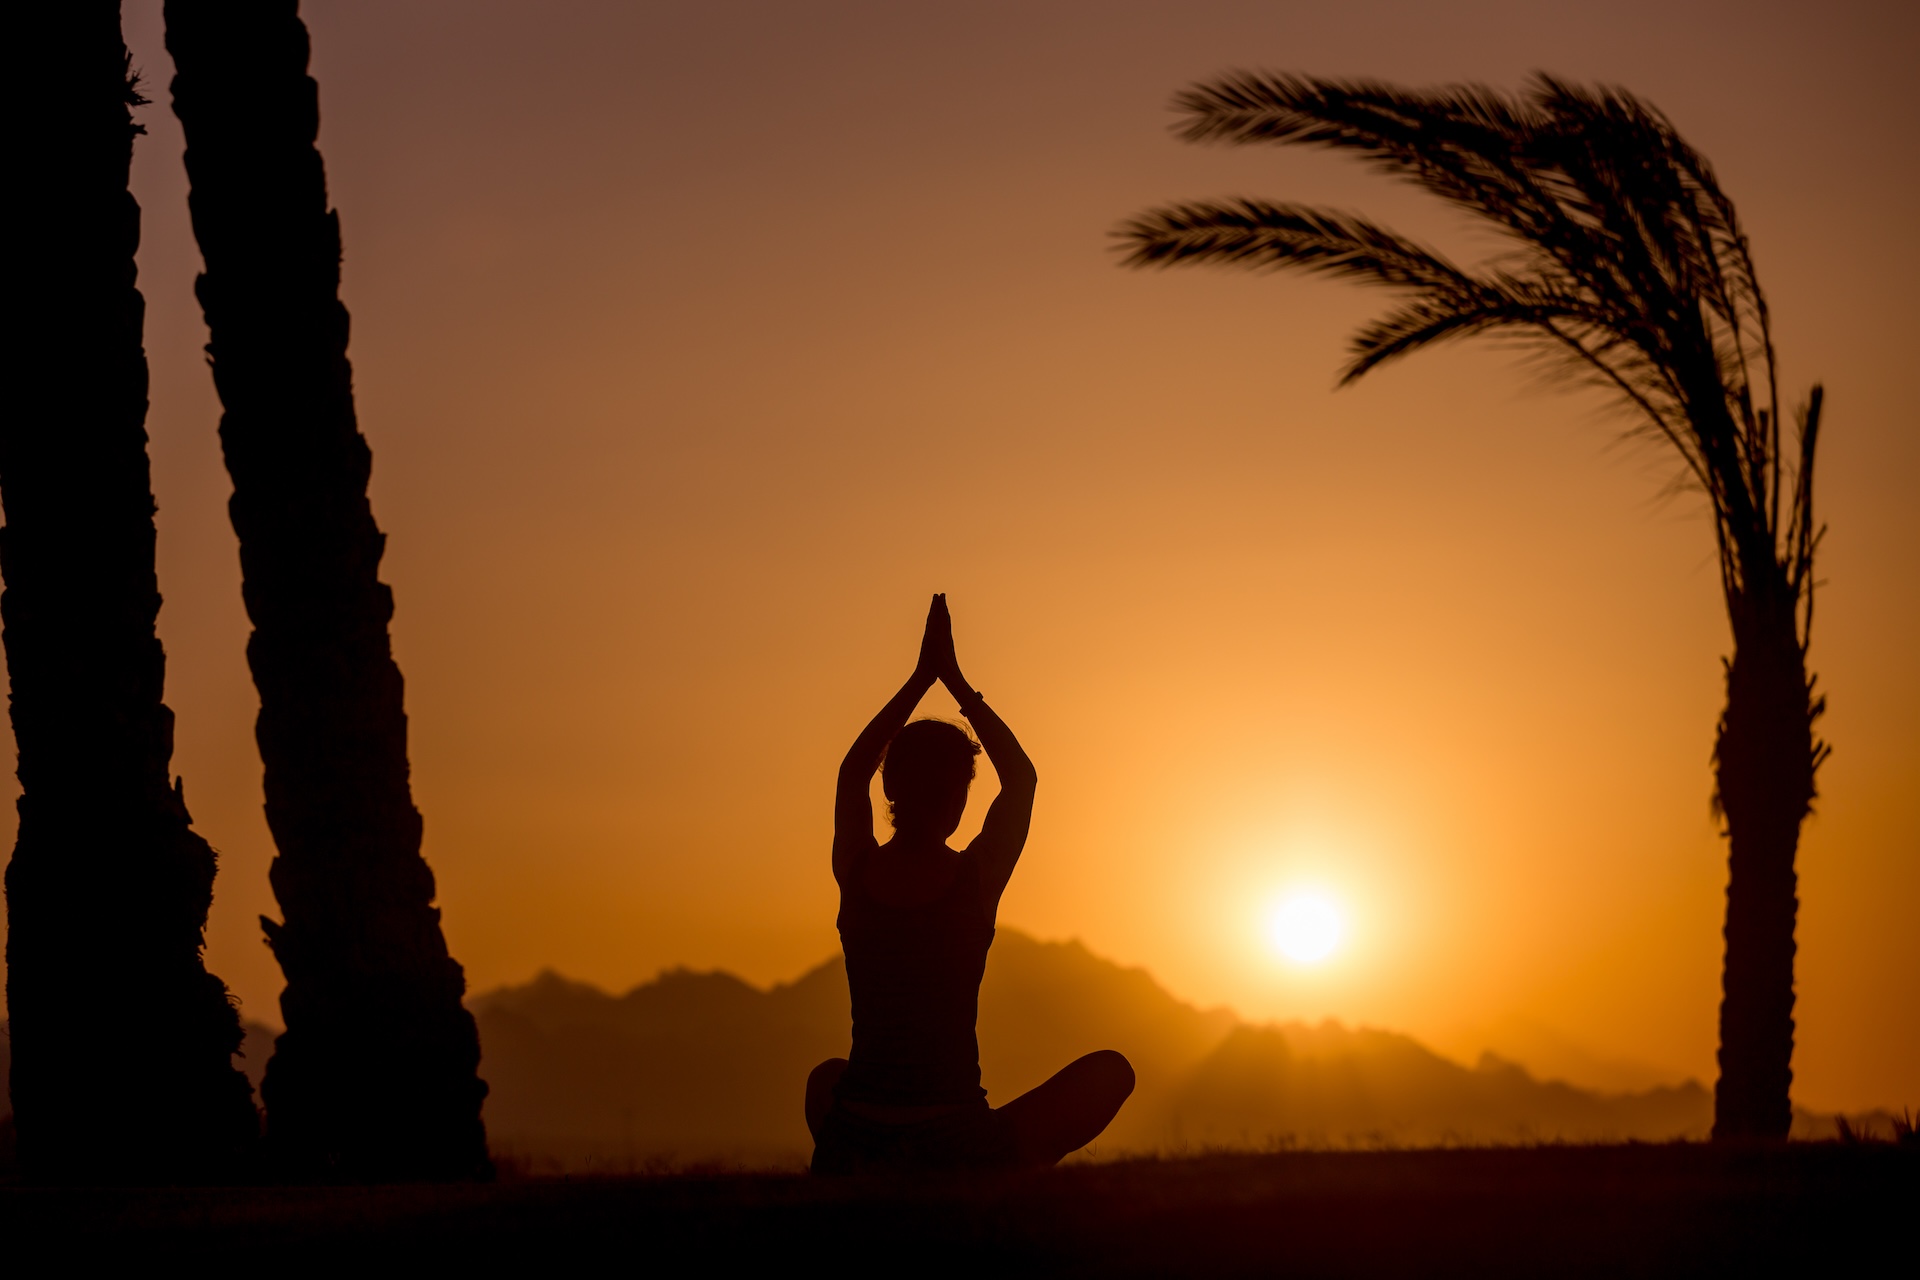
Surya Namaskar, also known as Sun Salutation, is a dynamic sequence of 12 yoga postures performed in a continuous flowing series. Surya Namaskar is done to honour the sun. Because the Sun gives energy and nurtures like a mother. The same sun is said to be in the body too (the solar plexus). We even salute the sun in the body that gives us energy and nourishes us.
ॐ भास्कराय विद्महे महादुत्याथिकराया धीमहि तनमो आदित्य प्रचोदयात ।।
Meaning- Let me meditate on the Surya Deva, the maker of the day, give me higher intellect, And let the Lord Sun illuminate my mind.
In Vedic Tradition sun is worshiped and during sunrise one does sun salutations. Not just in Vedic tradition but, in many other civilizations, the sun is worshiped. If God is considered a force that supports growth, nourishment, and life, then the Sun is the most visible deity for all living beings on Earth.
Early Christ was said to be “the sun of righteousness”. Egyptians believe that Sun or Re is the creator or king of all other Gods.
This practice, deeply rooted in the Vedic tradition, honours the Sun. It is the primary source of energy and life.
Combining physical movement with breath control and mindfulness, Surya Namaskar offers a holistic exercise routine that benefits the body, mind, and spirit. This blog provides a detailed exploration of Surya Namaskar, including step-by-step instructions for each pose, their benefits, and the overall significance of this Surya Namaskar or sun salutation.
12 Poses of Surya Namaskar
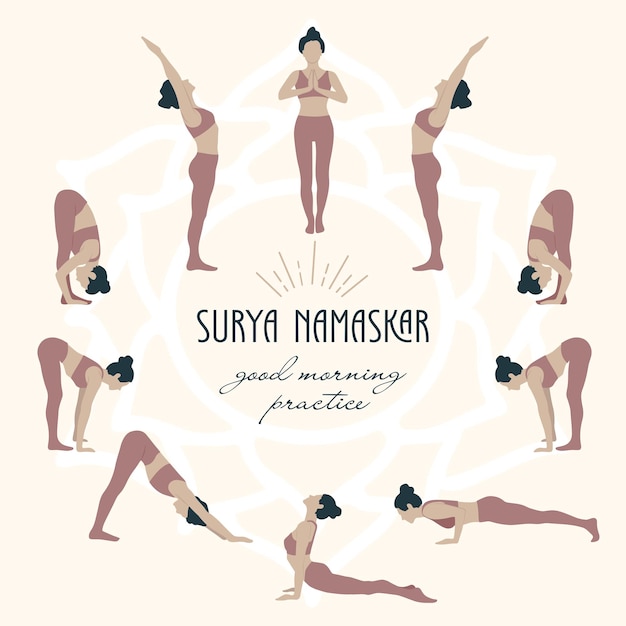
1. Stith Prarthnasana (Steady Prayer Pose)
- Steps:
Stand at the front of your mat with your feet together. Keep your arms by your side and shoulders relaxed. Bring your palms together in front of your chest in a Namaste or prayer position (like how Indians pray).
Close your eyes and observe your breathing- while connecting with yourself.
Sthtith = Steady and Prarthna = Prayer so stithprarthnasan is a steady prayer pose. When we pray we enter the space with an open heart, with a lot of gratitude in our hearts. The same should be the bhava (Feeling/expression) while doing this asanas. It induces gratitude and contentment in life. - Benefits:
– Improves mindfulness
– Gets the harmony of the body back
– Increases the psychological balance
– Increases concentration
Pro Yoga Tip: Keep your feet slightly apart if you have vertigo.
2. Hasta Uttanasana (Raised Arms Pose)
- Step:
Inhale and lift your arms overhead, arching your back slightly and looking up. Feet together and knees are straight. Palm is facing each other and let the fingers be together (being aware of these minute details will improve your mindfulness). Keep your arms (biceps) in line touching the ears.
As the flexibility improves one can start straightening the legs and placing the heels down on the mat. - Benefits:
– Improves flexibility of back
– Maintains the spinal alignment
– It promotes good posture
Pro Yoga Tip: Keep your eyes open here to find better balance and alertness.
3. Hasta Padasana(Hand to Foot Pose)
- Step:
Exhale and bend forward from the hips, Keep your spine erect while you are going down. bringing your hands to the floor beside your feet. Try to keep your legs straight. Keep your knees together while releasing the head down. - Benefits:
– Strengthens the back and leg muscles
– Improves flexibility
– Increases blood supply to the brain
– Improves the digestion.
Pro Yoga Tip: Keep your feet slightly apart if you have back and hamstring stiffness.
4. Ashwa Sanchalanasana (Horse Pose)
- Step:
Inhale and step your right leg back, keeping your left foot forward (in a lunge). Place your palm on either side of the left foot. Try to place your palm completely down. Lower your hips and look up keep your chest open and shoulders back. - Benefits:
– Stretches the spine
– opens the chest
– strengthens the leg muscles
– opens the psoas and also helps in easing sciatica pain.
Pro Yoga Tip: the knee of the leg behind can be on the mat or off the mat. I suggest you listen to your body and do whatever suits you. Both versions are correct.
5. Adho Mukho Svanasana (Downward Facing Dog Pose)
- Step:
Exhale and step the left leg back, bringing the body into a Mountain position. Let the spine be in one line. Press your palm against the mat to take your spine up. It is to stretch the spine upwards. Keep a comfortable distance between your legs. - Benefits:
– It makes the spine flexible
– Strengthens the shoulders and wrists.
Pro Yoga Tip: keep distance between your fingers for better grip on the mat.
6. Ashtanga Namaskara (Eight-Limbed Pose)
- Step:
While you hold your breath Lower your knees on the mat. Shift your weight such that the chest comes in line with the palm, then place the chest down next to the palm by bending your elbows, Keep your elbows close to the body and place the chin to the floor, keeping your hips elevated.
Eight parts of your body should touch the ground: toes, knees, chest, hands, and chin. Ashta = 8 Anga = bodyparts so eight body parts are touching on the mat in Ashtanga Namaskar. - Benefits:
– Strengthens shoulders and arms’
– Strengthens core muscles
– Prepares the body for chaturanga
Pro Yoga Tip: See that your toes do not lift from the ma while getting the chest down. Also, you may use a pillow below the chest if you are a beginner to this pose and have a fear of banging the chin down.
7. Bhujangasana (Cobra Pose)
- Step:
Now Inhale and slide forward, lifting your chest into a gentle backbend. Look up. See that your palm is next to the body and your feet are together places. The weight is not on the palm. Keep the gaze up between your foreheads while doing bhujangasana. - Benefits:
– strengthens the lower back
– aligns the body
– corrects the posture
Pro yoga tip: keep your feet apart if you have a backache.
8. Adho Mukha Svanasana (Downward Facing Dog Pose)
- Step:
Exhale tuck your toes in and lift your hips up and back, forming an inverted V-shape with your body. Press your palm and push your tailbone up. Keep your legs straight but be aware that your spine being straight is the priority. Initially, the legs can be slightly bent and the heels off the mat to align the spine. - Benefits:
– Makes the spine flexible
– Strengthens the arms
– Improves sleep
– Increases energy
– Makes the calf muscles flexible
Pro Yoga Tips: As the flexibility improves one can start straightening the legs and placing the heels down on the mat.
9. Ashwa Sanchalanasana (Horse Pose)
- Step:
Inhale and step your right foot forward between your hands. Keep your right leg in a lunge seeing that the knee is making a 90-degree with the foot. Look up as you open up your heart. - Benefits
– Prepares the body for backbends
– Opens the hip muscles
– Alleviates back pain
Pro Yoga Tip: place the back knee down on the mat to get the leg in front exactly in between the palms easily.
10. Hasta Padasana (Hand to Foot Pose)
- Step:
Exhale, bring your left foot forward, and keep the feet together. you are folding your body over your legs, and placing your hands beside your feet. Drop your head down and engage your legs. Let your neck and shoulders relax. - Benefits:
– Calms the mind
– Helps to manage stress
– It helps in letting go of deeply attached emotions.
Pro Yoga Tip: Keep your knees bent if you have backache.
11. Hasta Uttanasana (Raised Arms Pose)
- Step:
Inhale keeping your knees soft sweep your arms up, lifting your torso and arching back slightly. Keep the arms next to the ears. While coming up keep your spine straight. - Benefits
– Increases confidence
– Tones the arms
– Tones belly
12. Stith Prarthnasana (Steady Prayer Pose)
- Step:
Exhale and from front get your arms down into Namaste. Stand straight with your feet together and eyes closed, returning to a neutral position. Keep your eyes closed and stay here to catch your breath and relax your mind.
Health Benefits Of Surya Namaskar
- Physical Fitness: Engages and tones all major muscle groups, improving strength, flexibility, and endurance.
- Cardiovascular Health: Elevates heart rate, enhancing cardiovascular fitness and improving blood circulation.
- Weight Management: Helps in burning calories, reducing body fat, and promoting muscle tone.
- Digestive Health: Stimulates digestive organs, improving metabolism and aiding digestion.
- Respiratory Health: Increases lung capacity and improves respiratory function through coordinated breathing patterns.
- Mental Health: Reduces stress, anxiety, and depression by promoting relaxation and mental clarity.
- Detoxification: Stimulates the lymphatic system, aiding in detoxification and boosting immunity.
- Spiritual Growth: Enhances mindfulness, inner peace, and spiritual awareness through meditative movement.
Integrating Surya Namaskar into Daily Practice
To maximize the benefits of Surya Namaskar, consider the following tips:
- Morning Practice: Perform the Surya namaskar at sunrise to align with natural rhythms and revitalise the body and mind.
- Consistency: Practice daily or several times a week to experience long-term benefits.
- Mindfulness: Focus on synchronizing breath with movement and maintaining awareness of each posture.
- Gradual Progression: Start with a few rounds and gradually increase as your strength and endurance improve.
- Personalization: Adapt the sequence to suit your individual needs, fitness level, and health conditions. Seek guidance from a yoga teacher if necessary.
The Pace at which Surya Namaskar as per Ayurveda
The pace at which Surya Namaskar should be performed varies according to different yogic traditions and individual goals. Here’s a general guideline for the pace of exercise according to the three doshas:
Vata Dosha:
Vata-dominant individuals tend to have qualities of dryness and lightness (making them feel restlessness and ungrounded in mind), and they can also experience aches and pains. Therefore, their exercise should be grounding, gentle, and not overly intense. They benefit from exercises that are steady, and rhythmic, and promote stability. For Surya Namaskar, Vata types may practice at a gradual pace- focusing on smooth transitions and mindful movements to avoid overexertion.
Pitta Dosha:
Pitta-dominant individuals are characterized by qualities of heat, intensity, and sharpness. Their exercise should be moderate to prevent overheating and should not be overly competitive or aggressive. Pitta types can perform Surya Namaskar at a moderate pace, ensuring they maintain a balance between exertion and relaxation. They may benefit from focusing on breath control and maintaining calmness throughout the practice.
Kapha Dosha:
Kapha-dominant individuals have qualities of heaviness, stability, and changelessness. Their exercise should be invigorating, stimulating, and dynamic to counteract tendencies towards lethargy. Kapha types can practice Surya Namaskar at a slightly faster pace to increase energy flow and enable circulation. They may benefit from incorporating more energetic movements and maintaining a steady rhythm to prevent Inertia.
Overall, the pace of Surya Namaskar should be tailored to the individual’s needs, maintaining a balance between mindfulness and physical exertion.
Conclusion
In conclusion, 12 poses of Surya Namaskar is much more than a mere exercise routine; it is a holistic and transformative practice that has stood the test of time. Rooted in Vedic tradition and celebrated across various cultures, this dynamic sequence of 12 yoga postures offers a comprehensive workout that harmonizes the body, mind, and spirit. By engaging major muscle groups, enhancing cardiovascular health, and promoting mental clarity and spiritual growth, Surya Namaskar provides multiple benefits that are invaluable to any wellness regimen.
Incorporating Surya Namaskar poses into your daily routine can significantly elevate your quality of life. Practising at sunrise can align you with natural rhythms, revitalizing both body and mind. Consistency is crucial for long-term benefits, so aim to practice daily or several times a week. Focus on your breath with movement and maintaining mindfulness to fully experience the practice’s calming effects. Start with a few rounds and gradually increase as your strength and endurance improve, personalizing the sequence to fit your unique needs.
Embrace this ancient tradition to unlock its myriad benefits. Whether you seek improved physical fitness, enhanced mental well-being, or spiritual growth, Surya Namaskar offers a profound path to overall well-being. Make it a part of your daily routine and witness the transformative power it brings to your life.
Are you ready to integrate Surya Namaskar into your daily routine and experience its profound benefits for yourself? Have you experienced the benefits of Surya Namaskar, or do you have any insights to share? Feel free to add your thoughts in the comments!